
Project Summary
For this next tutorial, I thought it would be interesting to develop a game similar to the Totem Destroyer series of games that remain popular on mobile devices. I’ve called it CoinDrop! In this variant, a coin is placed on top of a stack of wooden and stone blocks – and the player must remove each of the wooden blocks without letting the coin hit the ground. This is simple in some cases, a bit more challenging in others!! For the tutorial, I’m highlighting several features of the Defold Game Engine: (a) all elements of the game are included in a single collection, with a set of data tables used for generating game objects unique to each game level, (b) code reuse is a real key to success in game development, so I’m reusing many of the routines developed in previous tutorials, and will highlight them as I walk through the project, and finally (c) I’ve included the implementation of a Level Selection GUI – a pretty common feature in most casual games.
Introduction: GAME OVERVIEW
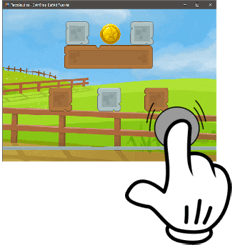
CoinDrop! is based on several Totem Destroyer games that are popular on both iOS and Android mobile devices. Similar to our last tutorial — the mechanics of this game are primarily targeted at younger children. But more difficult levels will be entertaining to all. The game objective is pretty simple — a coin rests on top of a stack of both wooden and stone blocks of various sizes. The player needs to remove each of the wooden blocks without the coin hitting the floor to win the level. As wooden blocks are removed, gravity is applied to the stack and all components (wood, stone and coin) fall accordingly.
My goal in this tutorial is to leverage many of the Defold techniques that have already been introduced — and enhance them with some additional ‘tweaks’, such as:
Here’s what the final CoinDrop Game looks like:
- SIMPLE DEFOLD GAME DESIGN – The game is based on a single collection (main.collection) and a single Graphic User Interface (mainMenu.gui) — keeping the overall game design very simple and straight-forward.
- DATA DRIVEN GAME OBJECT CREATION – CoinDrop! Game Objects are spawned within each level based on data table based locations and number of Wood/Stone Game Objects per level. A table of spawned objects is maintained to support removal of all Game Objects at the completion of each level.
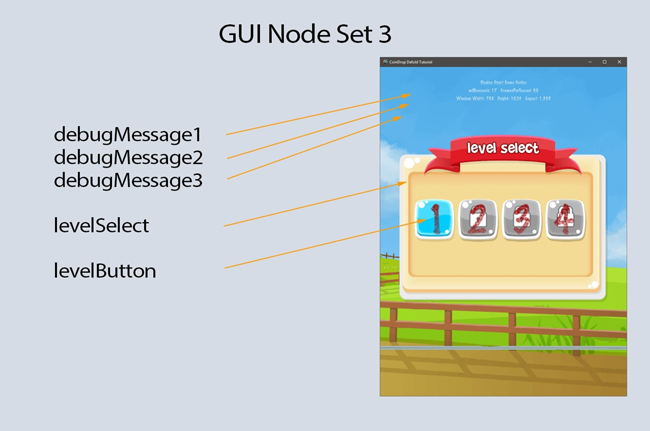
- GUI CLONE TREE FEATURE – A unique aspect of this game’s GUI design is the use of node-tree cloning. For the Level Selection Screen, the buttons for each available level are dynamically generated using the Defold gui.clone_tree feature. This assists in keeping the design flexible for the addition of additional levels, as well as facilitating different node textures supporting level availability (aka, you can’t run level 2 until you’ve successfully completed level 1).
- DEFOLD METRICS – For this project, I’ve incorporated the frames per second utility developed by Björn Ritzl of the Defold team.
- CURSOR BASED COLLISIONS – A cursor Game Object is used to trigger user clicks on a Wooden Block Game Object.
- SCORE KEEPING BY LEVEL – The project includes flag variables which monitor how many wooden blocks have been removed, and if the coin has hit the floor.
- USE OF LUA MODULES FOR UTILITY CODE – This project incorporates two common Lua Modules: (a) animationFunctions, supporting button, popup and GUI node animations, and (b) fpsUtil – which captures frames-per-second and milliseconds between frames.
- DEFOLD DESIGN FEATURES USED FROM PREVIOUS TUTORIALS – The game includes many of the key features highlighted in the previous tutorials, to include: (a) animated splashscreen logos, (b) a custom render script, (c) custom fonts, (d) use of a button template, and (e) onscreen debug messaging.
High-Level Design Description
For this project, my intent was to simplify the design which was presented in the Balloon Pop! project — specifically, avoiding multiple collections and multiple GUIs. The more complicated approach in Balloon Pop is very useful when you have very different game level components, or complex game logic unique to each game level — but, sometimes, you just want to have a simple game that is quick and easy to develop. CoinDrop is pretty simple!
Additionally, I wanted to develop a project which could be bundled for different aspect ratios — specifically targeting aspect ratios of 1.333 (my iPad) as well as 1.6 (my Samsung Android). The image sizing and custom render module in this project facilitate that.
For this tutorial, I’d recommend opening up the full project within the Defold Game Editor. I have included the full project within a zipfile which can be downloaded by pressing the following button. Go ahead and install it on your desktop and open it up with the Defold Editor.

The rest of this tutorial will walkthrough each element of the project and highlight the manner in which it was developed.
I: PROJECT SETUP PROCEDURES
Game.Project Setup
Within the Defold game.project file, you’ll notice that the following key parameters apply:
Project Atlases
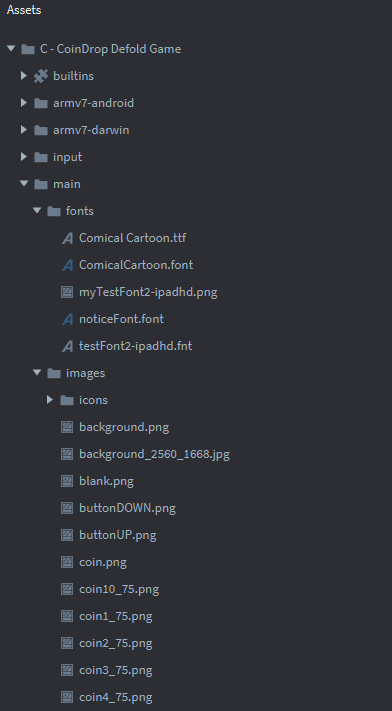
This project uses multiple atlases to accommodate the full set of .png images within the game. The images are contained within an ‘images’ subfolder under ‘main’ as you can see in the project explorer window. (You’ll also notice that I’ve placed some icon images within this ‘images’ subfolder as well – to support both android and iOS builds)
Attribution: These images are all free assets provided by the following sources: (a) background – publicdomainvectors.org, (b) coin – t-rexassets, (c) level select – GPSAS, (d) explosion spritesheet – powstudios.com, (e) stone and wood blocks – opengameart.org, and (f) playnow button – pngmart.com.
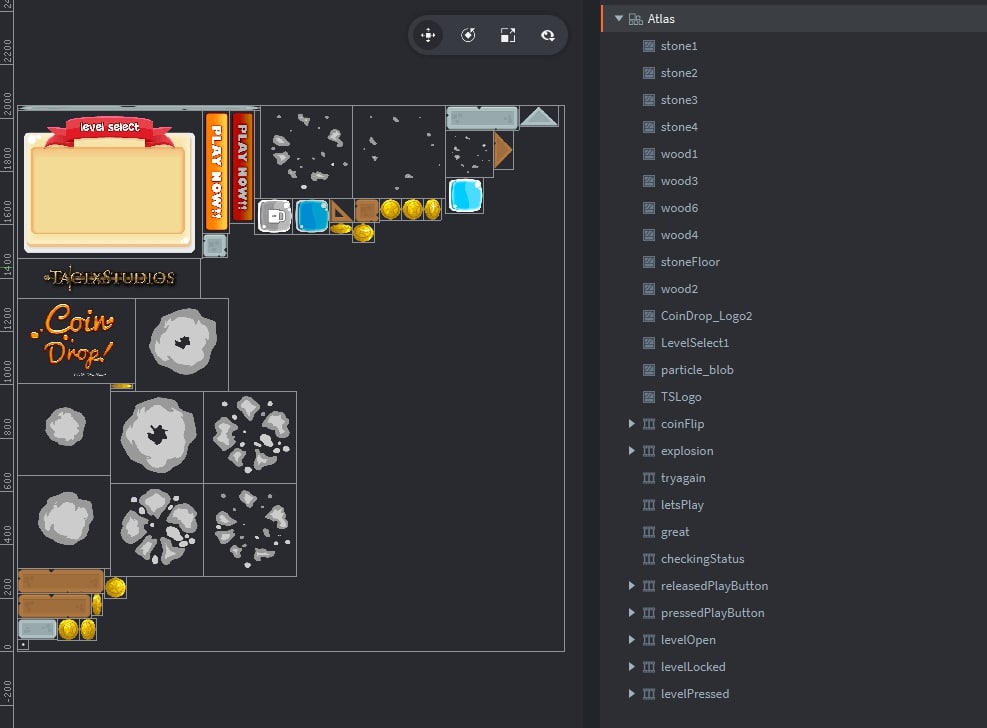
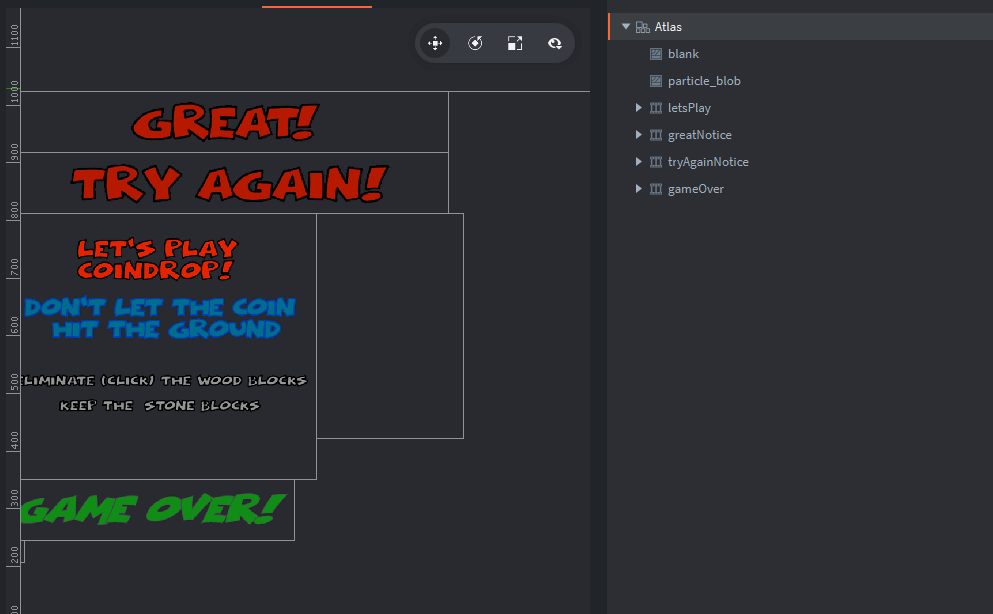
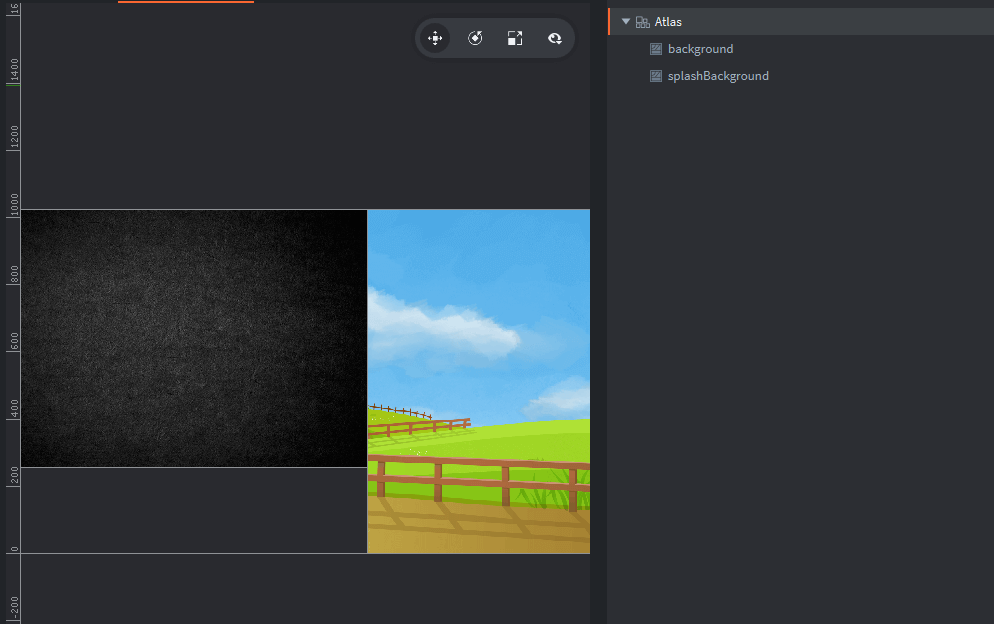
The following illustrations summarize the images and animations included within the three atlases associated with this project (multiple atlases enabling us to comply with the 2024 x 2024 pixel limitation which some older mobile devices require.
Elements within assets.atlas
Elements within notices.atlas
Elements within background.atlas
Custom Fonts
I’ve used a set of custom fonts to this project — as a means to match the tone & style desired for the game. I’ve placed them within a ‘fonts’ subfolder and have created the ComicalCartoon.font and noticeFont.font files for this project.
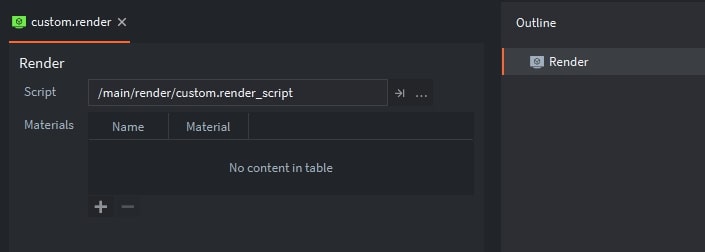
Custom Render Script
Bjorn Ritzl of the Defold team has created a custom render script which I’ve found to be very useful — it’s located on Britzl’s github site. This custom script enables you to select either (a) centering content with a maintained aspect ratio, (b) centered content and fitting the content to the screen with a maintained aspect ratio, or (c) stretching the content to fill the entire screen. For this project — I’ve selected the option to stretch the content to fit the screen — but you now have the flexibility (depending upon the type of game being developed) to switch between these options.
This custom rendering script is added as follows.
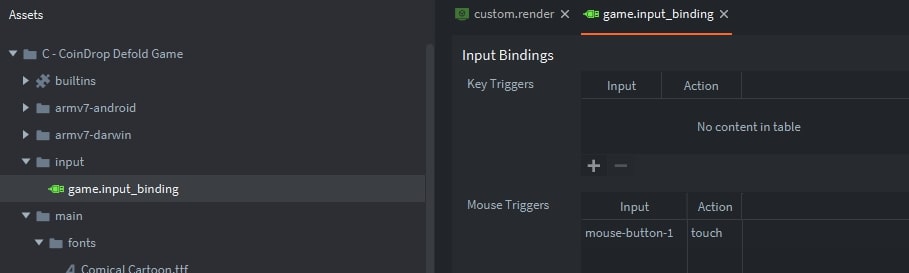
Game.Input_Binding
The last step in the initial project setup was configuring the input bindings — we’ll keep it simple, only a ‘touch’ input associated with ‘mouse-button-1’, aka, the left mouse button (or touch on a mobile device).
Lua Modules
The last initial setup step was creating a subfolder for the common Lua Routines which are used in this project. I’ve included animationFunctions.lua (which is a collection of gui animation routines which has been used in previous tutorials) and a new utility fpsUtil.lua (which provides Frames Per Second metrics).
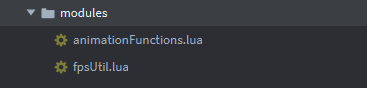
I have extracted the fpsUtil routine from a robust set of Defold Metric routines prepared by Björn Ritzl, a developer on the Defold team. This full metrics extension is available on one of Bjorn’s GitHub pages.
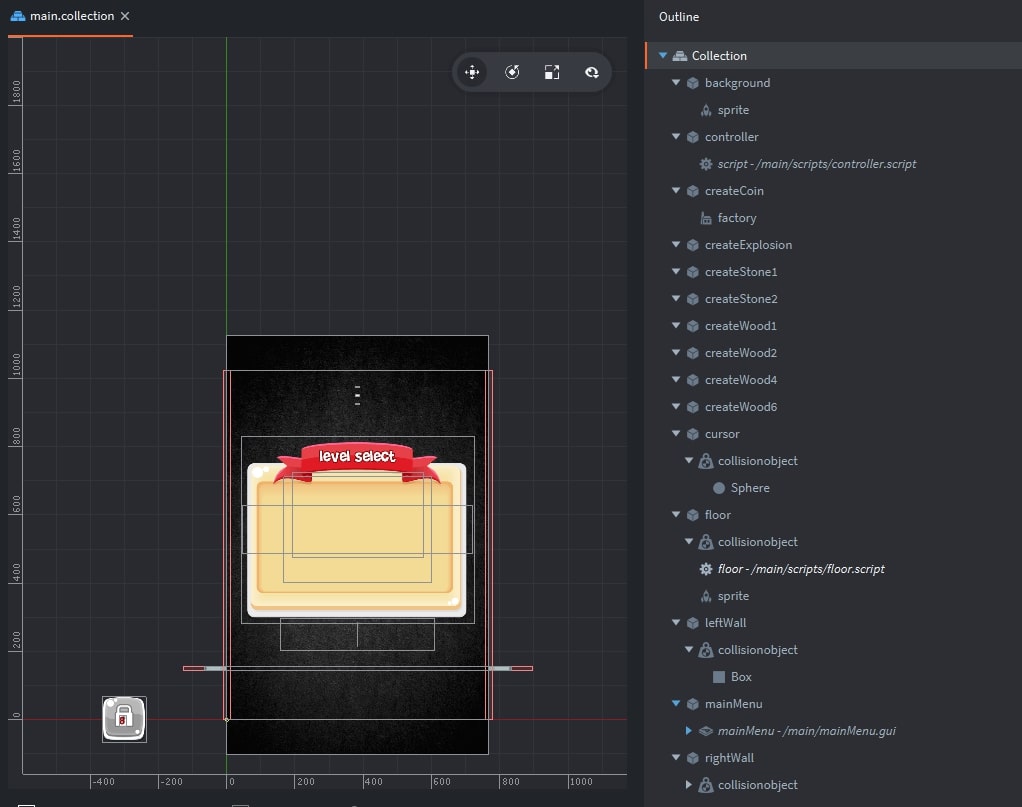
II: MAIN.COLLECTION – HIGHLIGHTS
For this project, I created a new collection within the main folder – with the name: main.collection. The following image highlights the key components within this collection, in particular, (a) a background and collision objects which delineate the left, right and floor of the playing area, (b) a controller Game Object (GO) to hold the controller script, (c) game factories for dynamically generating several unique game objects used within the game (coin, wood blocks, stone blocks and explosion animations), and finally (d) a cursor Game Object.
Playing Area Delineation
Game Objects have been added which represent the left wall, right wall and floor of the playing area have been created — each with a ‘static’ collision object to keep them stationary. This is very similar to what we did in the 2d Physics-based Collisions tutorial.
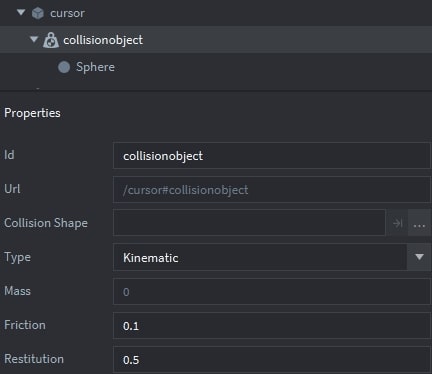
Cursor Game Object
A cursor Game Object is added to this project, to include a Kinematic Collision Object with a sphere shape. Note that the Collision Type is set to ‘Kinematic’ — aka, its position is controlled by the user, and the user can therefore control if and when it will collide with other objects.
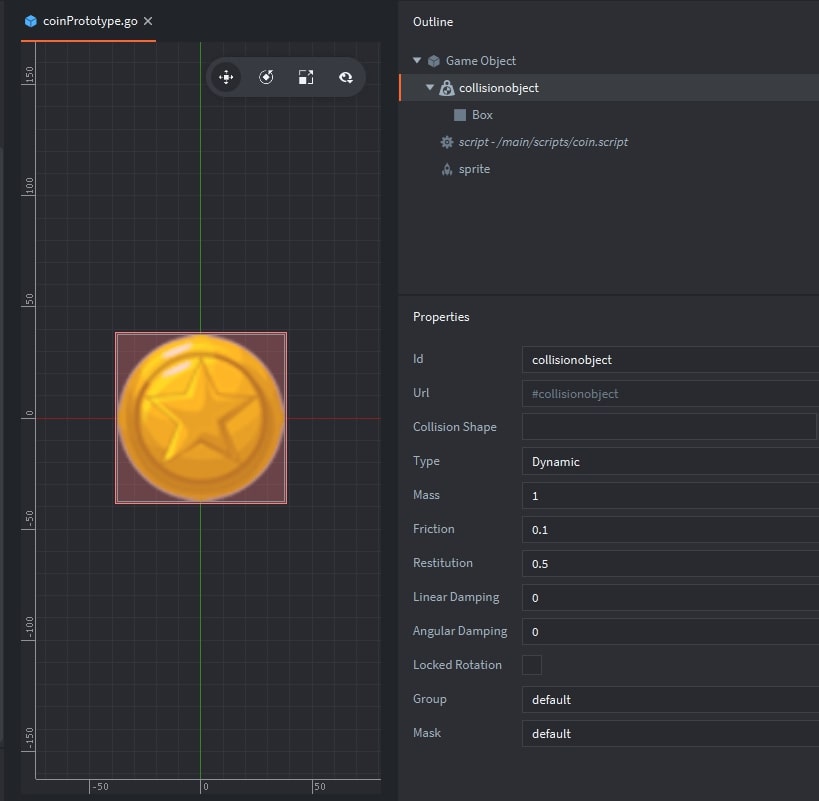
Game Object Prototypes
Prototypes are required to support factories for generating Game Objects dynamically during the game. coinPrototype.go is an example as shown below. Note that the collision object within this prototype is ‘dynamic’, which enables physics to control its movement due to gravity during game play.
Similarly, I’ve added prototypes for:
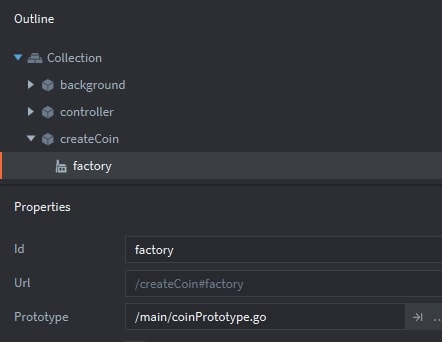
Within the main.collection – each of these prototypes support a factory component to a Game Object. For example, the createCoin Game Object within main.collection and its factory/prototype is shown below.
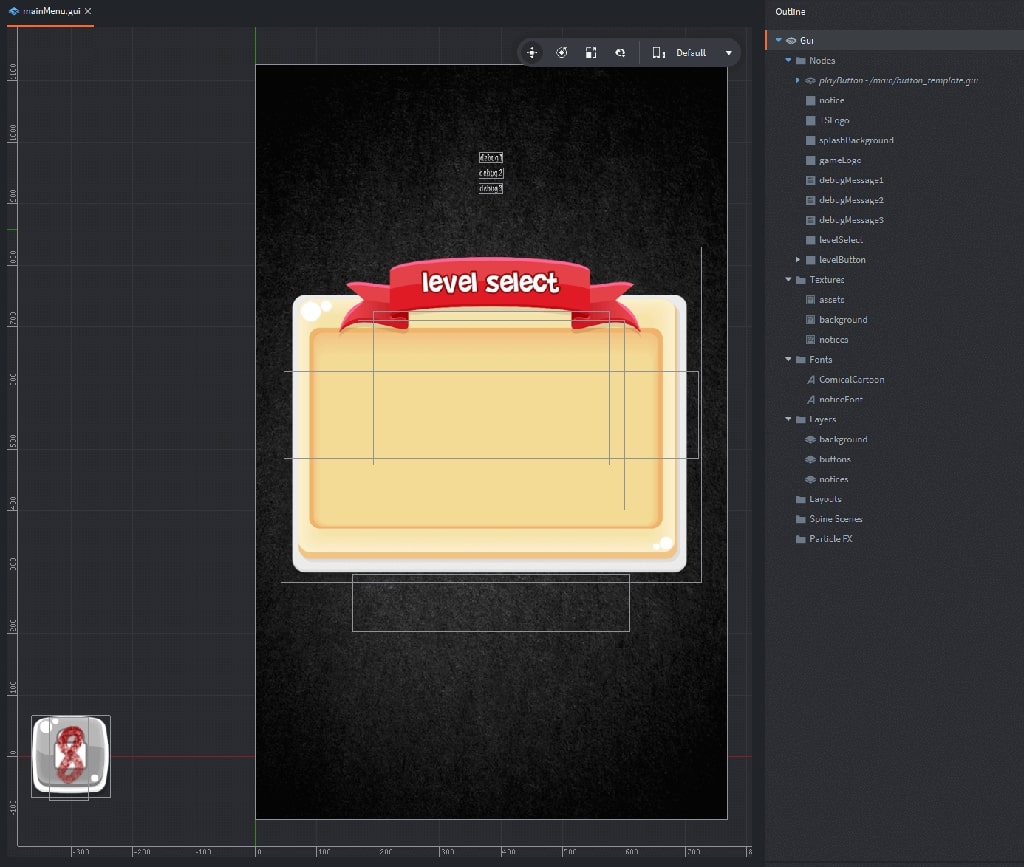
III: MAINMENU.GUI – HIGHLIGHTS
Go ahead and double-click the mainMenu.gui file within the Project Explorer — that’ll bring up the following outline for the GUI.
Textures and Fonts
This GUI includes all three atlases (assets, background and notices) to support images depicted within the inteface. Also, it includes both custom fonts (ComicalCartoon and noticeFont).
Layers
I’ve only added three layers for this GUI – from back to front: background, buttons and notices.
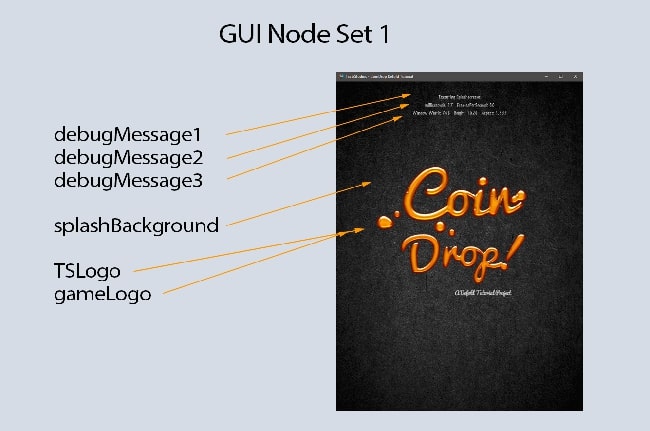
GUI Nodes
The following illustrations show how each of the GUI nodes are reflected within screenshots of the final game project.
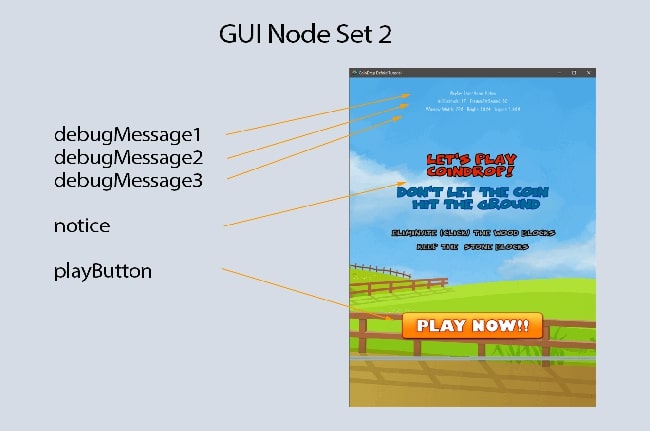
Please note that the playButton was created using the button_template. The detailed logic which controls each of these nodes is contained within the main.gui_script which will be described later in this tutorial.
IV: script walkthroughs
The following script files are components of the CoinDrop! game — and control the actions related to all gameplay, to include:
I’ve tried to provide complete explanations of the game’s logic within embedded comments throughout the source code.
Source Code for controller.script
Source Code for coin.script
Source Code for woodBlock.script
Source Code for floor.script
Source Code for explosion.script
V: gui script walkthroughs
TFor this project, all graphic interface logic is included within a single gui script:
The Lua Source Code is provided below — with the features and implementation techniques highlighted within the embedded comments.
Source Code for main.gui_script
VI: FINAL RESULT
This tutorial highlights the major components of the CoinDrop! project — assuming you’ve already learned the basics of creating a Defold Game Project. At this point – the project is complete.
As shown previously, I have included the full project within a zipfile which can be downloaded by pressing the following button.
Since I’ve transitioned to a more succinct approach in describing the design and development of this project — if something doesn’t make sense — or if you have a question on how it works — please drop me a note in the comment box below. I’ll get right back to you…and augment the tutorial if needed. Also – I’d greatly appreciate knowing if you find these tutorials helpful — just let me know below.
All the best - Dave