
Project Summary
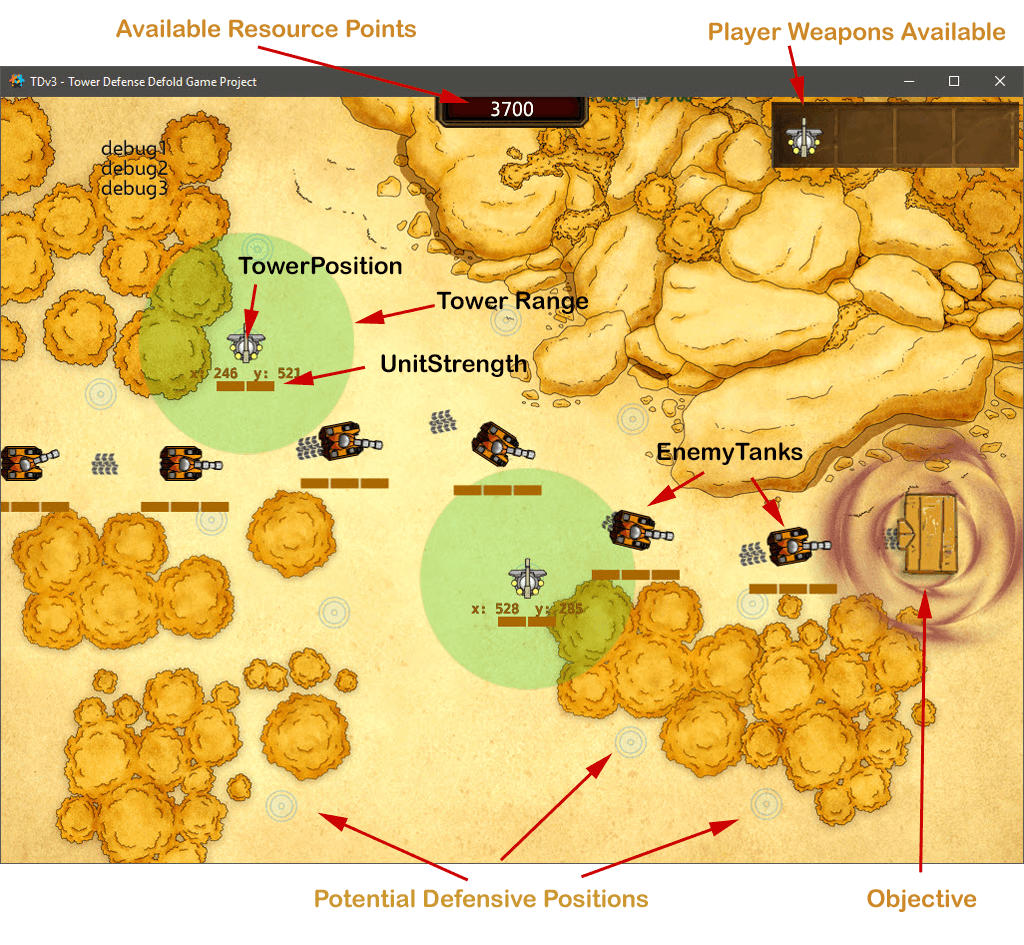
I have to admit -- I've been really looking forward to working on this tutorial. The Tower Defense genre of games have been around for many years, and are still; extremely popular. The premise of Tower Defense is pretty basic: (a) an objective is placed on a map and the player is tasked with defending it; (b) a series of enemy strikes are launched to try to get enemy units to enter the objective; (c) the player is given a set of resources which can be used to generate defensive structures (towers, guns, etal) and the player gets to locate these defenses along probable paths that the enemy will transit; Additional resources are generated when the player defeats an enemy unit, and those resources can be used to either add additional defensive positions, or alternatively, the player's resources can be applied to upgrade a specific defensive location.
The following illustration highlights some of the major game components that we'll be incorporating into our design - specifically:
Similar to the last tutorial sequence, I have broken down the project into a series of consecutive builds in order to keep each step of the development easier to understand. For the Tower Defense Project -- I'll be developing a total of four builds.
I: PROJECT OVERVIEW
This series of four tutorials will demonstrate a technique that I normally use in developing games. I'm a strong proponent of following a set of sequential builds -- each build meeting a discrete set of design criteria...and also generating a workable, fully executable game application. I think I used the term ‘blocking and tackling’ in my last tutorial -- that mindset is still very apropos. To try to design, develop, code and test any game of any complexity all in one block (often referred to as the 'waterfall model')...from my experience, is very risky.
Okay, enough theory, let's start building a Tower Defense game!
- BUILD I: – For this initial build, the design goals include the following: (a) leverage the techniques described in the previous few tutorials for creating an introductory set of splashscreens (both developer and game logos); (b) develop a level selection menu, which includes locking the ability of a player to select a level until the player has successfully completed a previous level; (c) display a map image for Level 1 as the backdrop for game play; (d) initialize the global variables that control overall gameplay (NUM_LEVELS, ACTIVELEVEL, etc); (e) implement a set of debugging messages to highlight game status on-screen as well as bypass control variables that allow the player to ignore opening splashscreens.
- BUILD II: – The second build leverages each of the functions created in Build I, and adds the following features for the initial Level 1 sequence of play: (a) specific game positions are defined for enemy unit starting locations and vertices along alternative strike paths; (b) an objective game object and position is defined; (c) three Tank Game Object Prototypes are created as the basis for three distinct enemy unit types, (d) a set of alternative Strike Paths are defined; (e) develop the spawning procedure for generating enemy units on a given strike path, and finally (f) create a graphic highlight to emphasize when an enemy unit reaches the players objective.
- BUILD III: – The third build for this project will complete all game functions related to Level 1 gameplay -- adding several major game components, to include: (a) create a panel which enables a player to select a defensive weapon and drag/drop it onto a defined defensive position; (b) establish effective ranges and unit strength parameters for both player and enemy weapons and create triggers when a unit is in range of a defensive weapon; (c) develop fire effects when units are engaged; (d) apply weapon effects on both player and defensive units and implement a destroyed feature if a unit loses all its strength points; (e) maintain a resource scoring process for the player and control game play if resources and unit strengths are less than acceptable; (f) lastly, fine tune parameters to balance overall game play, to include speed, enemy unit strength, player defense weapon strengths and weights applied to exchange of fire between units.
- BUILD IV: – The final build will extend the game logic and features developed within Builds I, II and III to support additional game levels. For this tutorial, a Level 2 and a Level 3 will be added, each with their own unique mapsheet, enemy paths and available tower defensive units. The general difficulty of the game will slightly increase over these two follow-on levels as well.
Here's what the final Build I result of Tower Defense looks like:
Go ahead -- click the following thumbnail.
At this point, the result isn't much different than what we've developed for some of our previous tutorials -- it's really just a reskinning of the SplashScreen and Level Menu Functions developed previously. That said – reusing previously developed components makes a lot of sense.
BUILD I PROJECT FILES
Here’s the full project for Build I within a zipfile. I’d recommend downloading and extracting the files into a work folder, then opening it up using the Defold Editor (v2) in order to follow along with the walk-through of the structure of this initial build.

II: PROJECT SETUP PROCEDURES
Game.Project Setup
If you haven't already, go ahead and open up the full project within your Defold Editor v2. Within the Defold game.project file, you’ll notice that the following key parameters apply:
Project Atlases
This project uses multiple atlases to accommodate the full set of images within the game. The images are contained within an ‘images’ subfolder under ‘main’ as you can see in the project explorer window. (You’ll also notice that I’ve placed some icon images within this ‘images’ subfolder as well)
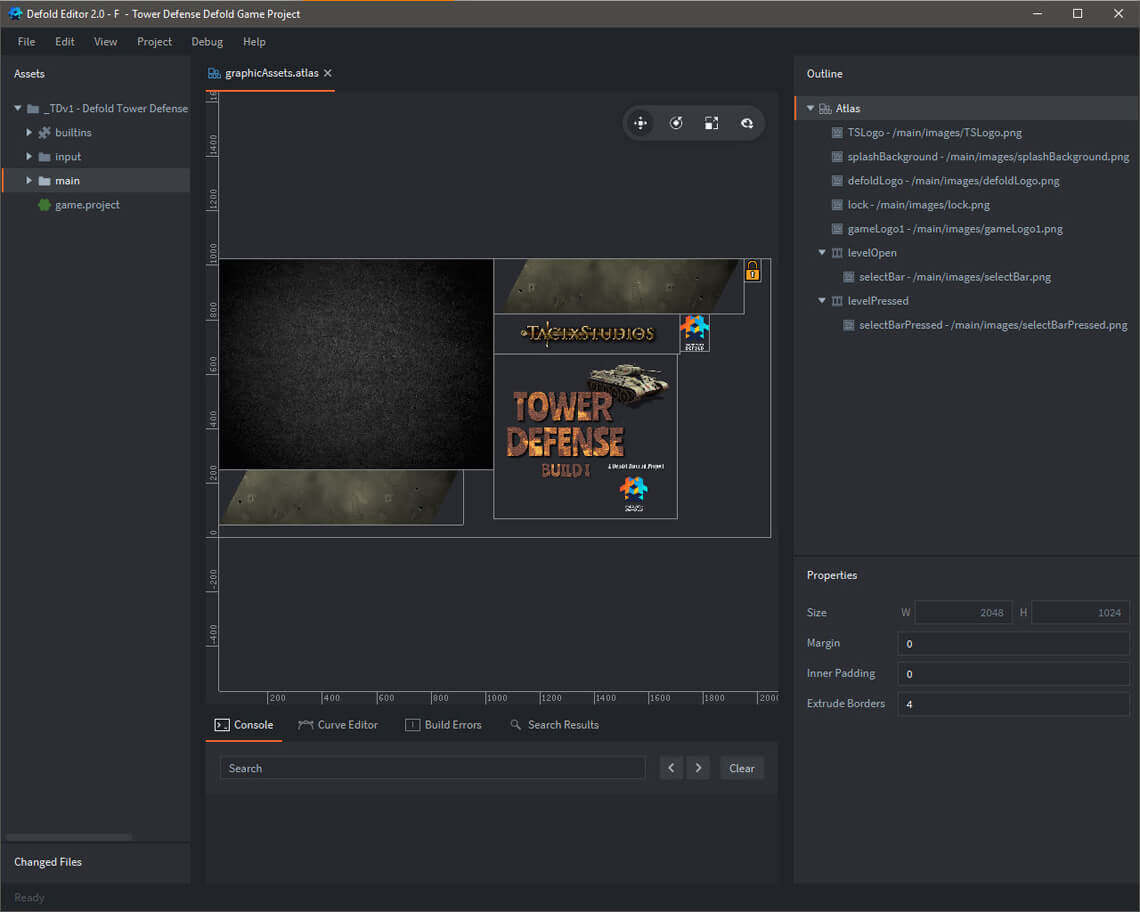
Elements within graphicAssets.atlas
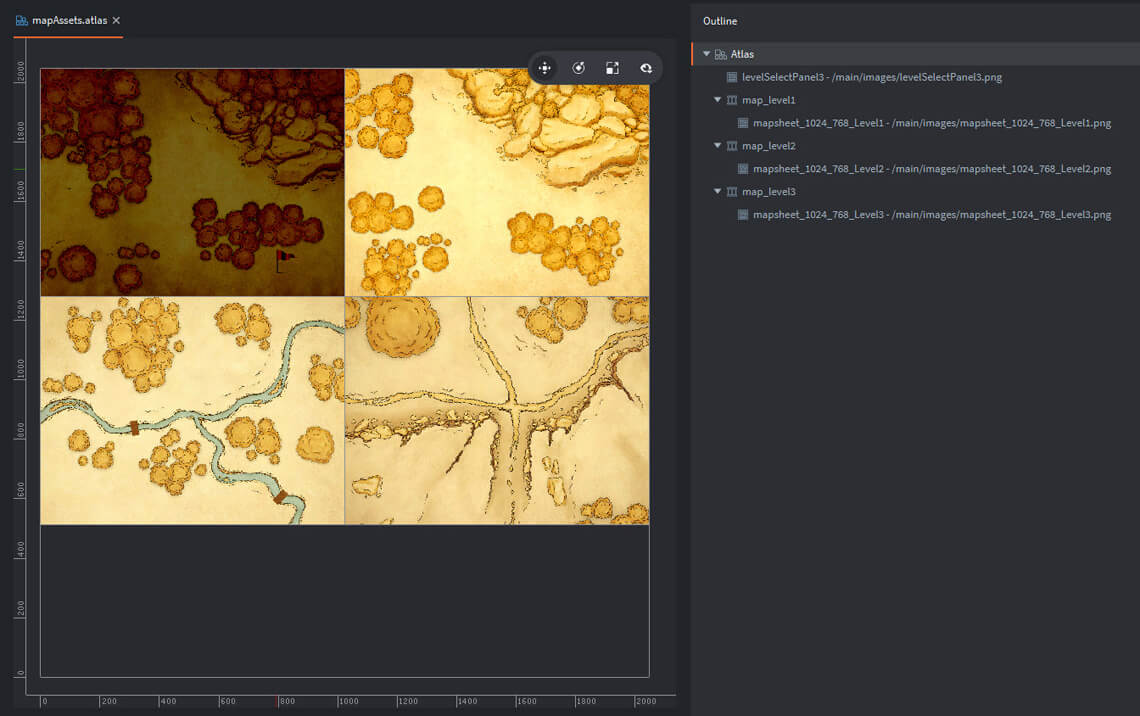
Elements within mapAssets.atlas
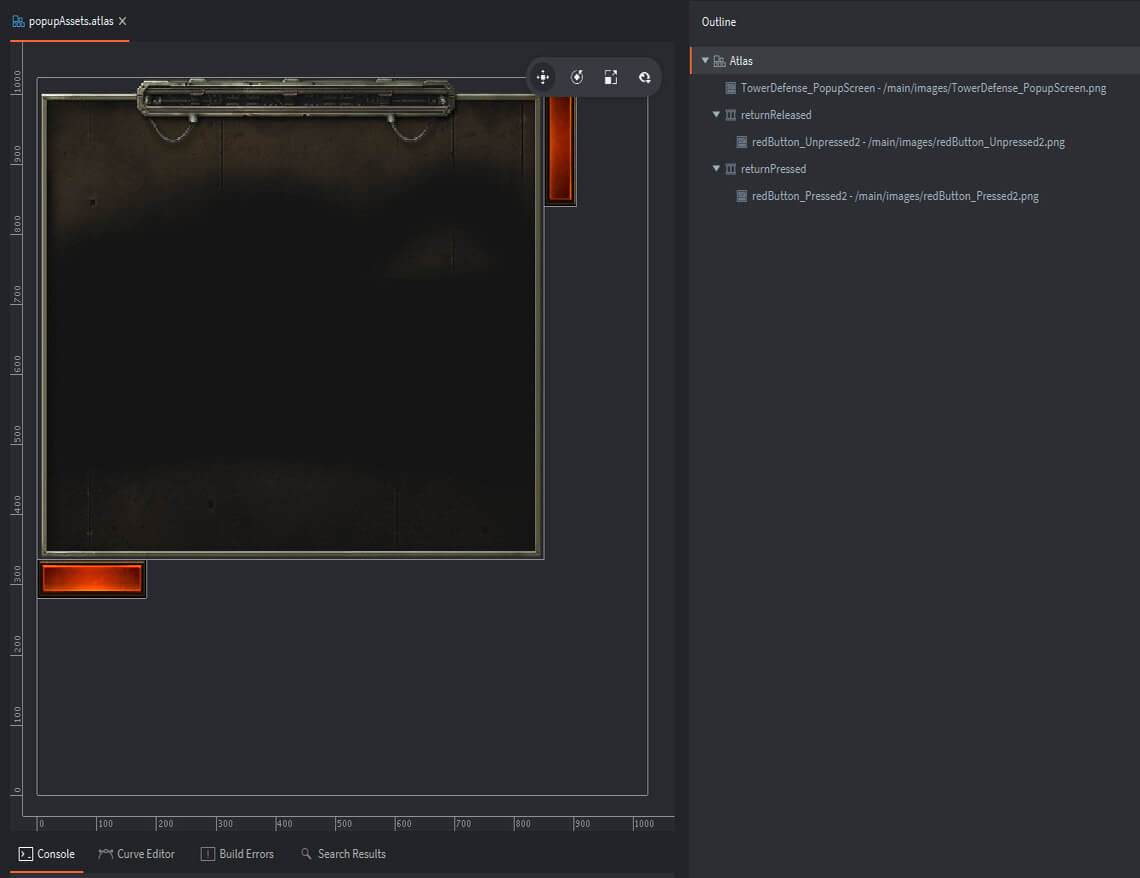
Elements within popupAssets.atlas
Attribution
These images are all free assets provided by the following sources: (a) splashBackground – publicdomainvectors.org, (b) map assets – Ink & Bone at roll20.com, and (c) tanks and towers - freegameassets.com. The game logo text was created using the free utility available at textures4photoshop.com. The remaining assets were created using Photoshop Elements 2018.
Custom Fonts
I’ve used a custom font for this project. I’ve placed it within a ‘fonts’ subfolder and have created the noticeFont.font and noticeFont.font file for use on this project.
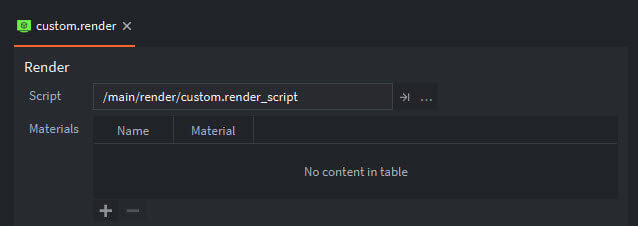
Custom Render Script
For this Tower Defense game, I'll be using the same customer render script we've used previously. This custom script enables you to select either (a) centering content with a maintained aspect ratio, (b) centered content and fitting the content to the screen with a maintained aspect ratio, or (c) stretching the content to fill the entire screen. For this project — I’ve selected the option to stretch the content to fit the screen — but you now have the flexibility (depending upon the type of game being developed) to switch between these options.
This custom rendering script is added as follows.
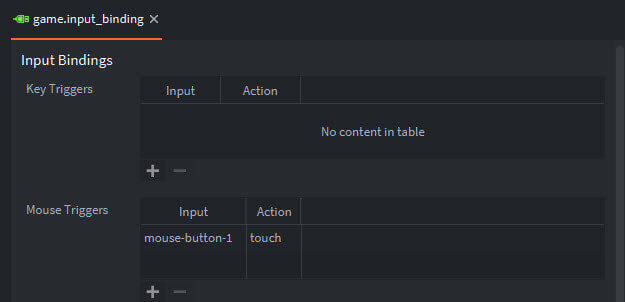
Game.Input_Binding
The last step in the initial project setup was configuring the input bindings — we’ll keep it simple, only a ‘touch’ input associated with ‘mouse-button-1’, aka, the left mouse button (or touch on a mobile device).
Lua Modules
I’ve included animationFunctions.lua (which is a collection of gui animation routines which has been used in previous tutorials) and a new utility fpsUtil.lua (which provides Frames Per Second metrics).
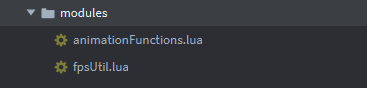
I have extracted the fpsUtil routine from a robust set of Defold Metric routines prepared by Björn Ritzl, a developer on the Defold team. This full metrics extension is available on one of Bjorn’s GitHub pages.
III: MAIN.COLLECTION
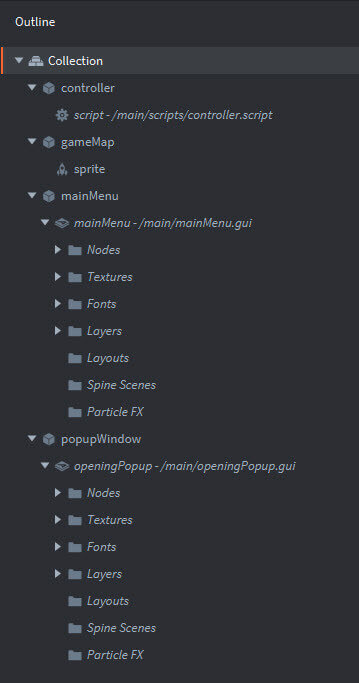
For this project, we'll use a single collection within the main folder – main.collection. The following image highlights the key components within this collection. The composition of main.collection is pretty straight-forward:
Here's the entire structure of main.collection.
IV: GRAPHIC USER INTERFACE
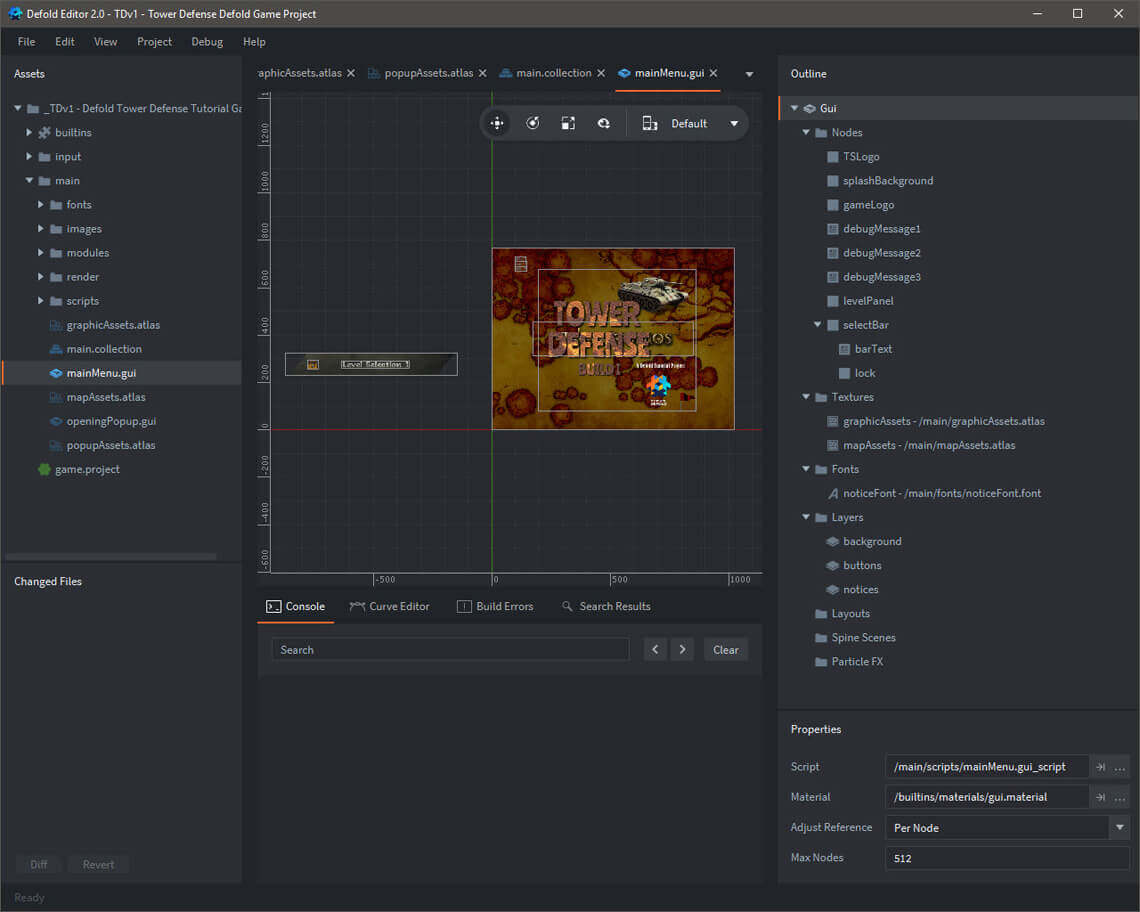
Go ahead and double-click the mainMenu.gui file within the Project Explorer — that’ll bring up the following outline for the GUI. As seen in the outline, the GUI consists of eight nodes, a reference to both the graphicAssets.atlas and the mapAsset.atlas as the basis for texture, the noticeFont and three layers to control display characteristics. It also references the mainMenu.gui_script within the property window.
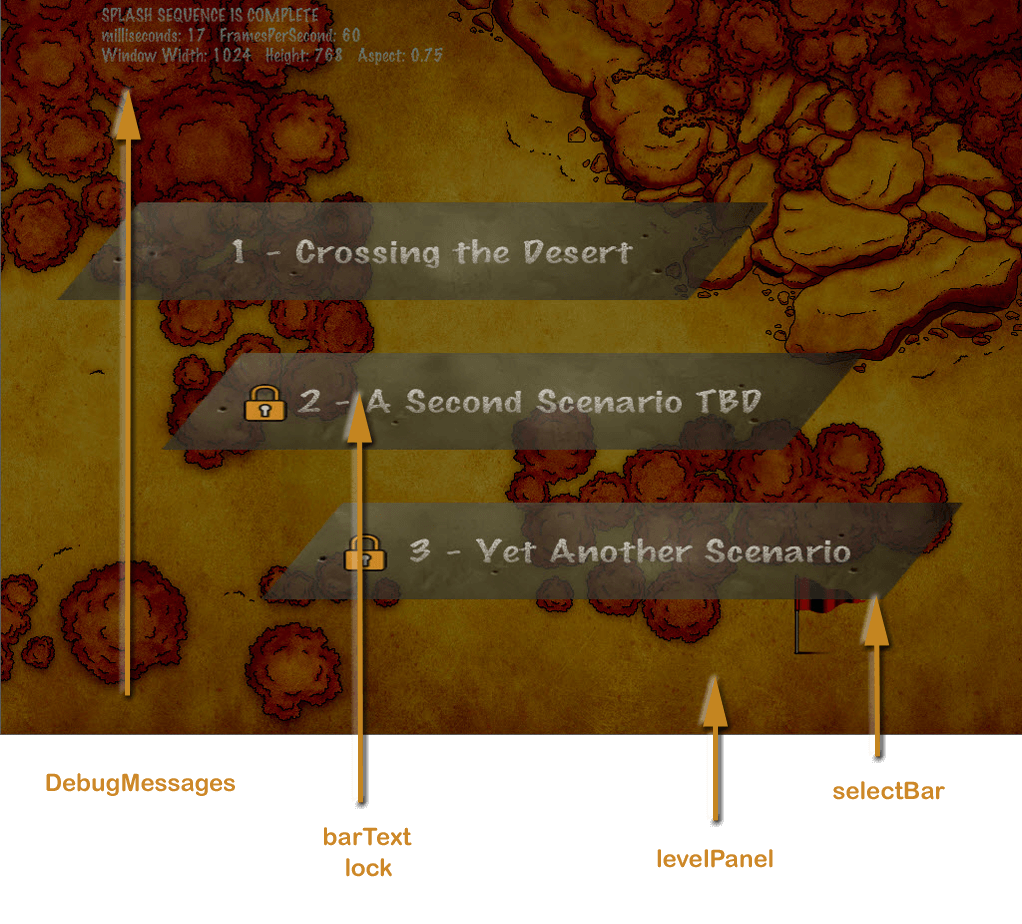
The following illustration designates each of the GUI Nodes within the mainMenu GUI:
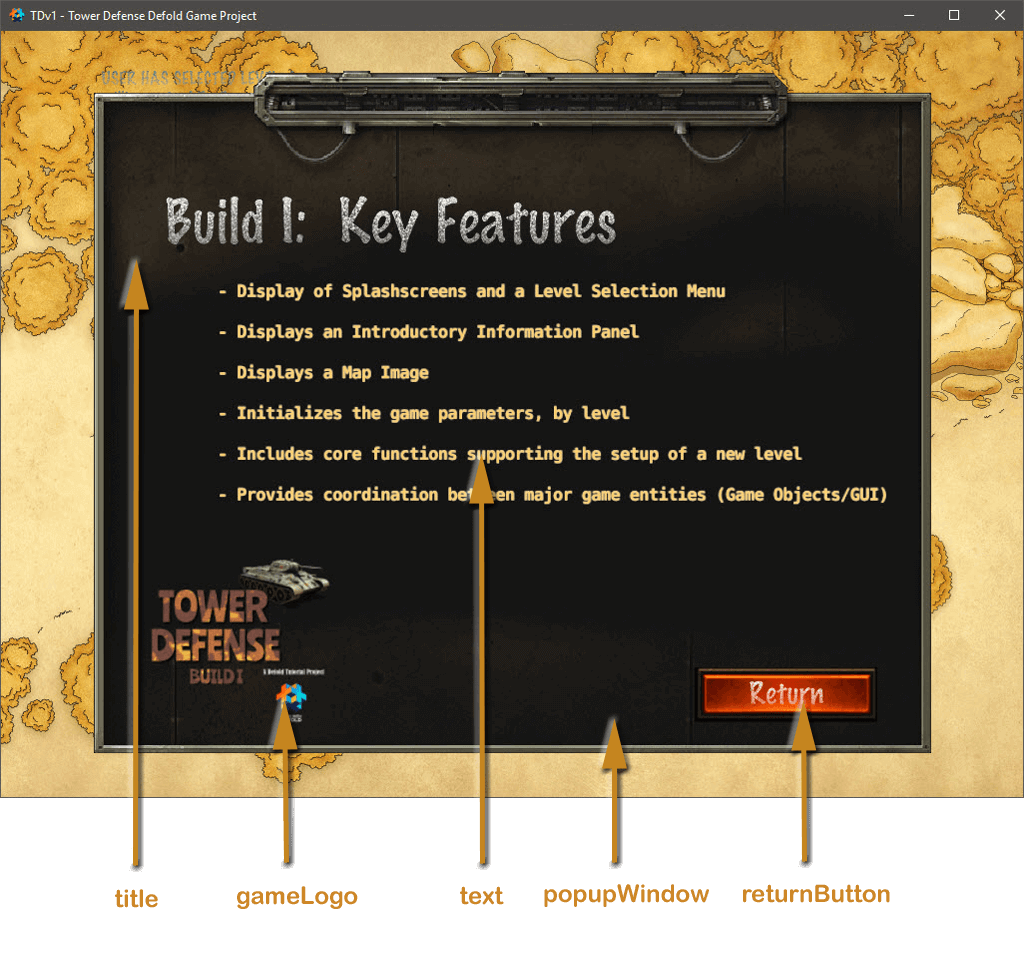
When you open the openingPopup.gui file within the Project Explorer — it consists of a popupWindow node, which has subnodes for the gameLogo, a title, text and a returnButton; it references both the graphicAssets.atlas and the popupAssets.atlas as the basis for texture, includes the noticeFont and the system_font and three layers to control display characteristics. It references the popupWindow.gui_script within the property window.
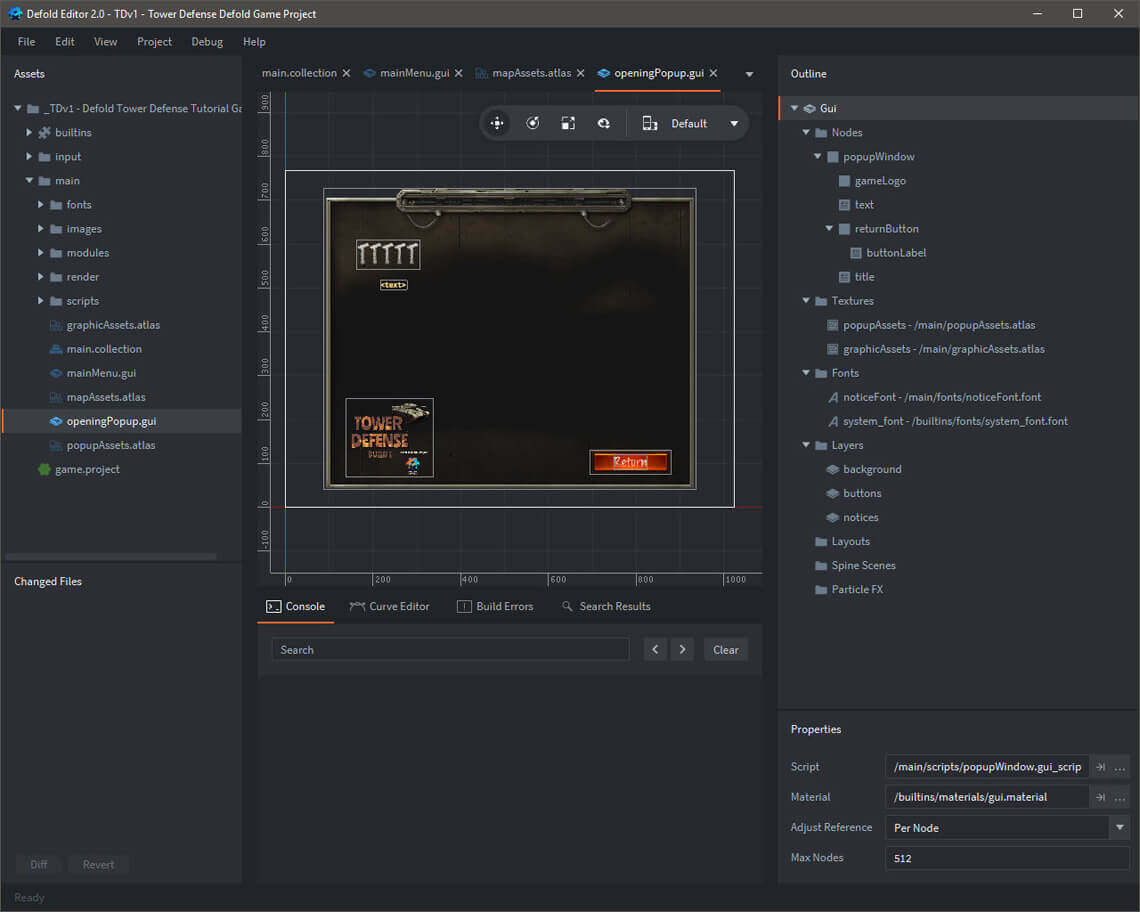
The following illustration designates each of the GUI Nodes within the openingPopup GUI:
V: BUILD I: SCRIPT HIGHLIGHTS
The following files control gameplay actions and support the Graphic User Interface within this initial Build of the Tower Defense game.
Script Files
GUI Script Files
I have included embedded comments throughout the source code to assist in easily walking through the logic.
controller.script
Provides the general support functions related to game actions. This script includes the following features:
- Initialization of all GLOBAL game parameters, to include window dimensions, Number of Game Levels, Active Level, and Debug Messaging.
- Initializes the game by obtaining window dimensions from the custom render script, disabling the map, and randomizing the seed.
- This script processes several messages: splashComplete, startSelectedLevel and window_dimensions.
- For this build, stubs are left for future on_input features and update processes.
I’ve included a copy of the commented source code below:
mainMenu.gui_script
Similarly, the mainMenu.gui_script provides control over the mainMenu Graphic User Interface -- whicih includes the opening SplashScreens and the Level Selection Menu.
- Display of animated Introductory SplashScreens
- Initialization of the Level Selection Bars by cloning a GUI Node Tree; modifying a sprite texture based on whether the level is open or locked; and placing the bars on a dulled mapsheet background.
- Sets Script Properties for each GUI Node (to improve overall game performance) and enables/disables them as appropriate.
- Processes the following messages: splashComplete | window_dimensions
- Processes on_input when a Level Selection Bar is touched
I’ve included a copy of the commented source code below:
popupWindow.gui_script
Similarly, the mainMenu.gui_script provides control over the popupWindow Graphic User Interface -- whicih includes the opening information panel.
- Includes local functions supporting fadein, fadeout, shrink and expand of the popupWindow
- Sets Script Properties for each GUI Node (to improve overall game performance) and enables/disables them as appropriate.
- Processes the following messages: showPopUpWindow
- Processes on_input when the return button is touched
I’ve included a copy of the commented source code below:
IV: COMPLETION OF BUILD I
That's a fair start to this project. It provides an animated opening sequence and an attractive level selection menu which will serve as a solid basis for the next round of development.
When you're ready, proceed to Build II -- here is where we'll start adding features that really make the game standout - to include: mapsheet presentation and enemy tank movement over multiple pre-defined paths.
All the best - Dave
Goto Build I Goto Build II Goto Build III Goto Build IV